
Which Tiny Desk AI Band Fits Your Clip?
Compare the original, football, family and retro Tiny Desk examples by lead visibility, outfit and where you plan to share the result.
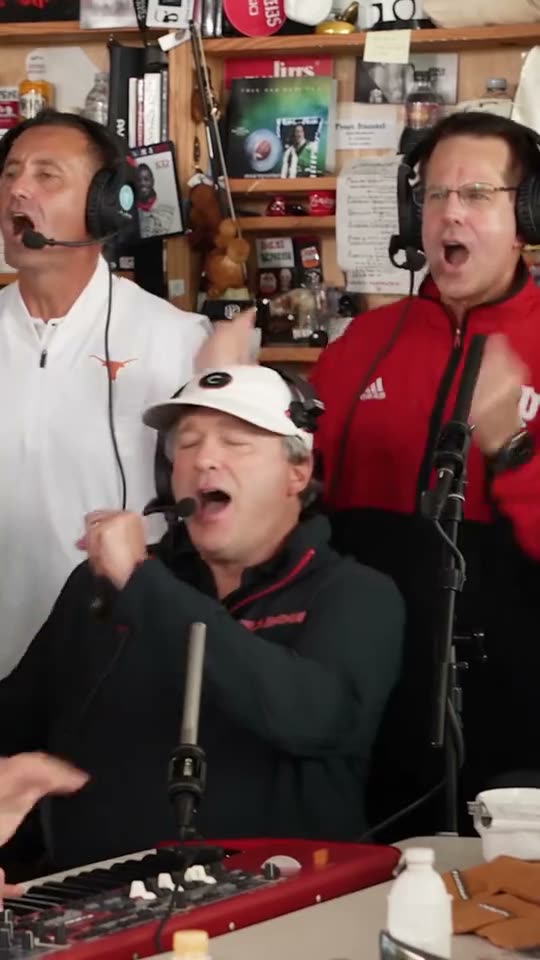
Pick the lead before the set
In the Tiny Desk AI example gallery, compare the moment the lead comes forward. The original scene gives you a straightforward performance, All-Loss and NFC East play better when your audience understands the football joke, and the family band offers a warmer tone. The example can include multiple performers even when you upload one image.
Compare the example clips before you generate
Watch the Tiny Desk examples once through, then scrub the preview to see where you would pause. Begin with the clip that frames the feature you want viewers to remember. On a second pass, compare how much space each take leaves around that feature as the subject moves. These times and dimensions describe the preview files; check the generator for current settings.
The All-Loss Band (540 × 960, 20 seconds)
Compare the team clothing in the wide frame with the opening face shot. Keep this idea if someone can identify the team joke from both. For your opening, look for the first unobstructed lead close-up. Put your own source beside the preview at phone width and check one jersey, sweater or collar. If the main detail is already hard to pick out in a still, compare another source or a preview with more separation before generating.
Family Band (540 × 960, 13.4 seconds)
The Family Band makes room for a warmer greeting. Look at the point where the next musician takes attention from the person you want to feature. To plan a band reply after the opening phrase, check the frames just before and after the corresponding movement. Note which object or part of the subject first approaches the crop. Keep the last usable frame on either side as a potential trim point.
Seventies Soul (540 × 960, 18.7 seconds)
Use the seventies look when wardrobe is part of the idea. Check whether the wide shot and the closer frames identify the same lead without a caption. Work backward from the widest shot of the musicians. Find a frame that could serve as the cover or the start of the next shot. Check it at the intended viewing size. If the important detail disappears there, test the crop in the edit first.
Use the clothing as a clue
Seventies Soul works when a distinctive collar or patterned top reads at a glance. For a sports version, one jersey color is enough to signal the joke. The yellow sweater example can help you see how a single color separates the lead from the band. Judge each take from the preview before asking the prompt to reinvent its wardrobe.
Set up a comparison with one useful result
Write a one-line brief and decide which parts should stay fixed across both options. For a scene comparison, reuse the same authorized photo, camera direction and intended output crop. For two workflows, use the same photo and delivery brief, then allow each tool its own controls. This gives you a comparison you can explain later, even if the clips use different staging or have different running times.
A team hoodie makes a sports parody legible before the singer moves. A lighter jacket and a clean background can work better for a personal greeting, where the face carries the idea. Pull one wide still from each contender and show the two images to someone who has never seen your draft. Ask them to point to the lead.
For this scene, make one jersey, sweater or collar your first check. Open the file at the same width as your draft and see which part of that detail remains clear. If the sample and your source make that check difficult, try a scene with more contrast around the lead. Choose material you have permission to use for the finished audience. With two people in an edit, approve the sources separately and identify which shot introduces each person.
Compare sets with the same lead
- Make a shortlist from the examples. Write one reason for each option, such as early lead close-up, a stronger wardrobe contrast, or a visible instrument reply. Discard any scene that needs a crop you cannot use.
- Try the original for a direct performance, Family Band for a warm personal message, and All-Loss or NFC East when the audience will get the sports framing. Seventies Soul is useful when the look of the room and clothing carries part of the joke.
- Use the same source photo and comparable supported settings for the two finalists. Keep track of which example supplied each prompt, because a new take can change both the camera and the performance.
- Check the opening, the clearest singing shot, and the full band view. Keep the one that reads at phone size and still makes sense on mute.
Two briefs you can paste into your edit notes
Use these as shot notes. For a generation, carry over the part that describes one visible action and match it to the scene already selected. Keep your text cards, edit points and soundtrack on separate tracks. This makes it easy to compare a tighter cut or a different ending without asking the model to rebuild material that already works.
First pass
Put the lead's face and one clear clothing detail in the first shot. Show one band member answering, then return to a wide shot where the lead is easy to find.
Name the single result you want the test to prove. Save one screenshot from each option at the point where the difference is obvious. If you can explain the improvement in a single sentence, you can choose between the two. If both pass, judge the amount of finishing work you would still need to do.
One focused revision
Keep the same portrait and frame size. Try another band setup with more space or stronger contrast behind the lead. Compare the first close-up and the widest frame.
When the outfit blends into the band, test a scene with more contrast around the lead and keep the rest of the setup steady. Compare the same action in both takes, using stills if movement makes the difference hard to see. A working first version is also a reference for your next draft. Save its source, chosen scene and short note together.
Run a small comparison
Use the same portrait with two contrasting scenes and leave the rest of the settings unchanged. Pause at the lead’s first clear close-up and at the widest shot. Keep the version where the face reads in both places, even if the other set looks busier or more elaborate.
For a friend who always wears a yellow jumper, compare the Yellow Sweater and original examples before generating. Note which one has the earliest clean close-up and whether the top contrasts with the players behind them. That tells you more than the number of musicians in the thumbnail.
What to check at the opening, action and ending
Before the action
Use the first unobstructed lead close-up to check one jersey, sweater or collar. Compare the generated frame with your source at the same viewing size. Check that the feature you care about is visible before the subject turns, the camera moves or a prop enters. If it is already missing, work on the input or framing first. A later adjustment has more to build on when the opening already looks right.
At the main beat
Around a band reply after the opening phrase, look at the same stage of the action in each candidate. If the outfit blends into the band, try a scene with more contrast around the lead. Describe what changed in visible terms: a hand enters earlier, the lead stays separate from the background or the final pose still reads. Write down which option passes your own brief, even if the other looks more striking in isolation.
After the move
Find the widest shot of the musicians and decide whether it is a usable final frame or a cut point. Play the full clip at normal speed with the sound muted, then turn the sound back on and play it again. The first pass tells you whether the picture explains the action. The second pass lets you hear whether music or dialogue arrives early enough to make sense without masking the reply. If an action only looks awkward when stepped through frame by frame, judge it in the actual export before rebuilding the shot.
Check the quote and prepare the finished cut
Open the Tiny Desk editor, choose the actual scene and settings, and read the quote shown before submitting. You can check Pavo AI Video pricing for plan details. After submission, use the task state to find the result. Review a completed take before starting another one. If you do need another attempt, write down the one change you are testing.
When more than one result passes, keep the one that needs the least additional work in your intended edit. Save the approved source, export and settings with names you can tell apart. If you used a local video as a starting point, keep the original clip and any permitted audio separately so you can still change the cut later.
Give the exported file one last check for one jersey, sweater or collar. If the shot needs another pass, keep the exported baseline so the next change is easy to judge. For a separate worked example or a more focused workflow, read Make a Tiny Desk AI Performance With Your Photo.
Common questions
How should I choose between a sports band and a family set?
Use the sports take when the jersey or team reference is the joke. A family set is more useful for a personal greeting, where the audience cares more about recognizing the lead than the set dressing.
Does a busier band make a better result?
Pick the composition that gives your subject the clearest role. Several musicians can establish the scene, while a shorter close-up often carries the actual payoff. Compare the visibility of the lead before counting background performers.