Flamingo Float AI Trend: Origin and How to Make the Rooftop Pool Video
Trace the Flamingo Float meme from the early pool-edge clips to the Dubai near miss, then make a rooftop drift from one portrait in Pavo.
Can I make the Flamingo Float video with my own photo?
Yes. Open the Flamingo Float AI workbench with one clear portrait. The Rooftop Drift example fills in a starting prompt for the pink float, the infinity pool and the view over the city. Upload your photo, choose where the float goes at the end, then review the output settings and price displayed in the workbench.
Decide on the ending before you edit anything else. A float that dips below the edge makes the skyline the surprise. A float that turns back into the pool gives you a near miss and a chance to show the rider's reaction. Both versions need the rider, water and edge to read in the same shot. You can direct the whole scene from a photo taken indoors.
What is the Flamingo Float AI trend?
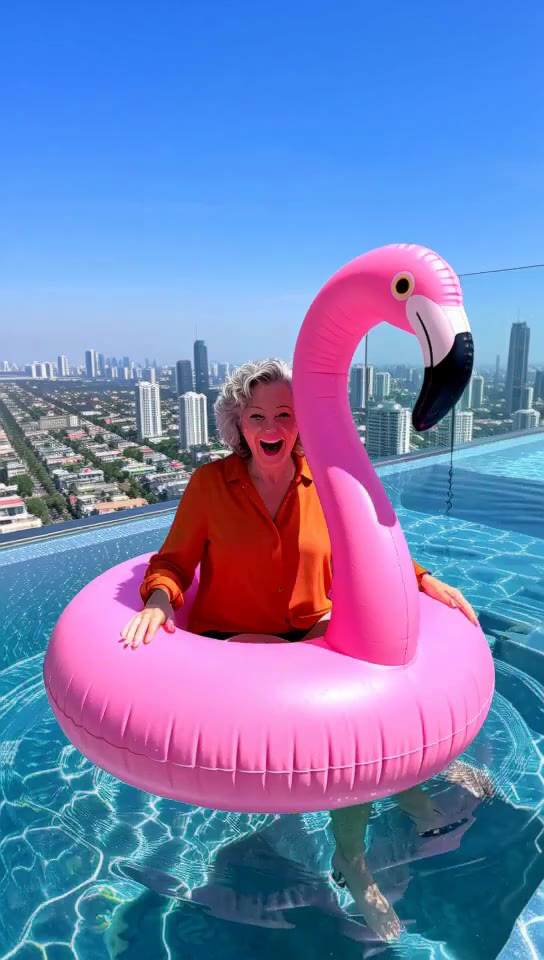
The Flamingo Float trend is a short rooftop pool scene built around a bright pink inflatable. A rider drifts near an infinity edge. From a low angle the water can seem to run straight into the sky, and a slight tilt of the camera reveals how far above the street the pool sits. The float gives the viewer an object to follow as the distance to the edge changes.
The name covers several endings. In one, the float rocks at the rim and comes back. In another, someone reaches in from the camera side and pushes the rider to safety. Some AI versions send the float down past the ledge. If someone calls it the infinity pool trend or the Thank You Bro trend, the ending and the caption help you identify which clip they mean.
Where did the rooftop pool video come from?
One early version appeared on October 29, 2026. AI filmmaker Ilia Prudnikov, posting as @cain.aii, showed a rider tipping near a glass pool edge above Singapore and rocking back. The post was marked as AI content. It is a useful early example of how the pink float and the drop could tell a whole story within one camera move. October 29 Instagram reel.
On November 2, Younes Zarou shared the Dubai rooftop clip with a short thanks in the caption. In that version a hand reaches in as the float approaches the edge. The rider's casual response helped the rescue version pick up the names Hey Bro and Thank You Bro. The two uploads show distinct setups and endings. The caption on Zarou's post leaves the production method unspecified. November 2 Instagram reel · TikTok upload.
The published timelines for both dates line up across multiple trend guides. Use the dated posts as landmarks in the spread, since the same scene is now described under several names. Early November template pages show a shift from sharing the near miss to putting a different rider on the float. MakeViral timeline · Oeneo timeline.
Why does a pink float make the reveal work?
Look at what the rider is doing before the camera dips. The person is sitting in a toy you might see on an ordinary holiday. The buildings in the background then give that ordinary pose a very different scale. The bright pink shape stays easy to track while the eye moves from the person to the waterline and finally down to the city. On a phone, those three details carry the scene even with the sound off.
The near-miss edit adds a small timing joke. A viewer may see the float close in on the edge before the rider reacts. The hand arrives from outside the frame, nudges the float and leaves the rider time to look up. Leave a pause before that nudge if the joke depends on the rider remaining calm. In a drop version, spend that same pause showing the pool rim so the tilt has a clear point of reference.
The format also gives people an easy part to change. Put a familiar person in a bright shirt on the float and the rest of the shot can stay simple. An elaborate wardrobe or several people all moving at once can pull attention away from the short approach to the edge.
Which version should you plan?
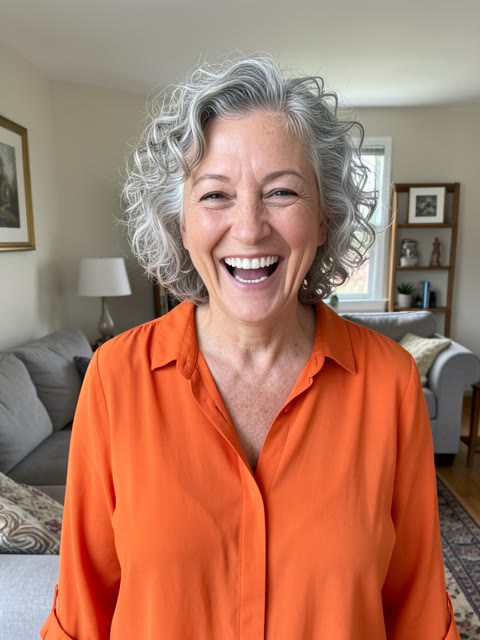
Watch the Rooftop Drift sample and its paired portrait before choosing. The sample runs just over five seconds. It pairs an indoor photo of a smiling person in orange with a silent rooftop scene. The float starts large in the foreground. As it moves beyond the rim, the camera points farther down and the rider gets smaller. That last change is what makes the city feel far below.
For a version closer to the Dubai near miss, plan an approach and a return. Give the float a clear direction, slow it down near the rim and let it turn toward the middle of the pool. Start with the returning motion alone. A second pass can add a brief push from the edge of the frame if the rescue needs a visible cause. This gives you a way to diagnose the edit if the float's direction looks wrong.
Both approaches work best when the rider stays seated and the float remains one recognizable shape. In the drop version the camera follows the float. In the return version it can stay level for the rider's reaction. The sample shows one possible scene. Pavo uses your photo and the edited prompt to render a fresh take, with the length shown in your selected output settings.
What photo should you upload?
Choose a JPEG, PNG or WebP up to 10 MB of one adult who gave permission. Use a sharp face, even light and a crop that includes both shoulders. A portrait from the chest up gives the generator a useful face and a visible shirt color. If the rider looks tiny on the float, try a source where the eyes and mouth stay readable when you shrink the image to the size of a phone thumbnail.
An indoor portrait works well when the face has clear contours. The paired photo below has a bright orange shirt and a clean view of the hairline. Those details are easier to follow once the float crosses the water. A busy group photo gives the model several possible riders. A dark face under a brim can become hard to recognize when the camera gets farther away. Compare the face and the shirt first if you have several photos of the same person.
For more ways to judge a portrait before paying for a render, see the photo selection guide for AI video.
How do you recreate it in Pavo?
- Start with Rooftop Drift. Select the sample so the opening frame and the starter prompt appear together. Play it once and decide whether you want to follow the float down or stay at pool level.
- Add your own photo. Upload your portrait in the photo slot. Check the thumbnail for the face, hair and shoulder line. If you want a particular shirt color, carry one color from the photo into the prompt so it reads against the float.
- Describe one continuous shot. Establish the rider and the skyline, give the float one direction, then specify the final camera move. The image and directions go into the generation request. The preview remains available on the page for comparison.
- Review your settings and generate. The workbench shows the current output settings and quote before you submit. When the video is ready, play it through and pause around the edge reveal. Keep a usable first take for comparison before paying for another pass.
The sample is shorter than a typical workbench output. When you want a fast social cut, find the first frame where the viewer can recognize the rider and the last frame where the ending makes sense. Trim between those points after downloading.
Two prompts for the pool edge
The first prompt makes the height reveal the payoff. Keep the float large in frame at the start, then let the camera follow it below the rim. Clear foreground water and a visible edge give the camera a reason to tilt.
Show the person in the uploaded photo sitting upright in a pink flamingo float in a glass-edged rooftop infinity pool. Keep the face, hair and shirt recognizable. Hold a vertical shot with the rider and skyline visible as the float turns, drifts to the glass rim and dips below it. Tilt down to follow the intact float with the rider still seated.
Use the second prompt if you want a more relaxed ending. Start with the same setup and change only the path of the float. The rider's look toward the camera can finish the shot once the danger seems to have passed.
Set one continuous vertical shot at a rooftop infinity pool. The person from the photo relaxes on a pink flamingo float and drifts toward the glass edge. Let the float turn back across the water as the rider looks up with a small smile. Keep the pool rim and skyline in view until the end.
What should you check before sharing?
First, watch the rider. Compare the face in the opening frame, near the rim and after the float changes direction. If the face changes when the camera tilts, try a closer initial framing or a sharper source portrait on the next attempt. Hold the shirt color and lighting steady while you test that change.
Next, look at the join between the water and the float. The float should move on the water before it reaches the edge. A fast jump across the pool can make the camera tilt feel unmotivated. Shorten the action to a drift and a pause, or make the float start nearer to the rim. The edit usually needs one clean move more than it needs a dramatic splash.
Finally, watch the clip on a phone with the sound off. Keep the pink neck and the rim within the middle of the screen, clear of interface labels near the bottom. If you add a caption, wait until the rider and the pool make sense on their own. Compare the size of the face on your phone with the preview in the workbench before exporting your cut.
Do you need the original sound?
The rooftop sample is silent, so you can plan the shot with the visuals first. In the near-miss version, a short reaction after the float turns back can be enough. A drop version can use a quiet stretch of pool ambience and a single accent as the city comes into view. Add audio you can use in the editor or posting app after you have a take with the right timing.
For a near miss, place the accent where the float starts returning. For a drop, place it on the first readable view down the side of the building. Check the clip once more after adding sound. If the accent is early, shift it to match the movement in the exported footage. Include an AI label when you share the fictional rooftop shot.
Can I keep the float on the water for the whole video?
Yes. Ask the float to circle within the pool and keep the rider seated, then finish on the view across the water. A turn back is a good ending when the portrait is the focus. Keep the camera high enough to show the waterline and make the turn easy to follow. If you prefer the height reveal, start with Rooftop Drift and keep the camera movement simple enough to see the rim.
Open the Flamingo Float photo upload when you have your portrait and ending. Start with the sample prompt, change the last move to fit the version you want, then compare your result with the preview before adding a sound.