
Make a Hotel Lobby AI Wedding or Engagement Teaser
Plan an orange-booth reveal, prepare a readable couple portrait, and put the event details on a separate end card.
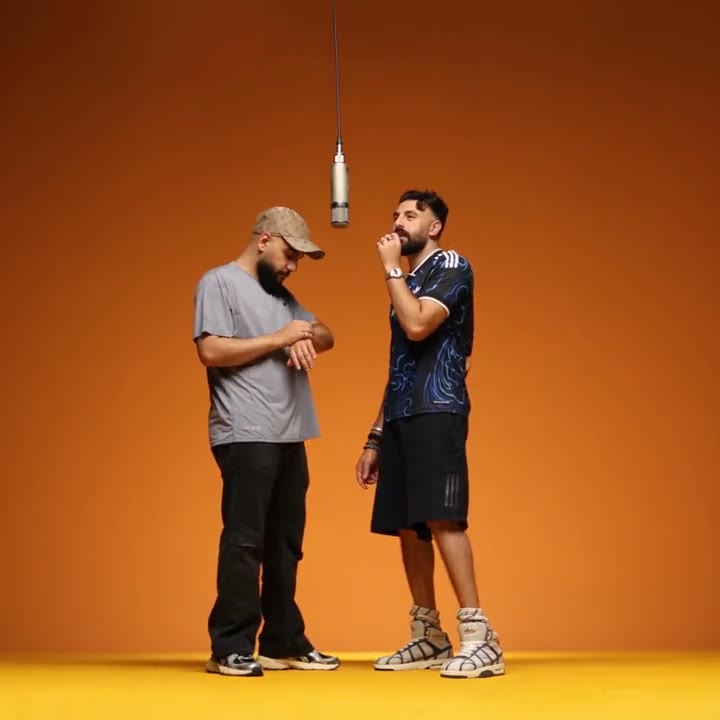
Separate the reveal from the invitation
Use the performance as the opening, then cut to a clean card with the couple’s names, date and RSVP details. Keep addresses and private venue information in the private version. The movement near the hanging mic is already busy, so it is a poor place to make guests read a date.
Compare the example clips before you generate
Open the Hotel Lobby examples and scrub through the clips at the approximate size your audience will see. Take a still at the opening, one at the handoff or gesture, and one near the end. Those three stills make a more useful editing plan than a cover image. The dimensions and times below describe the preview files.
Leather Couple (540 × 960, 29.8 seconds)
Black leather makes a strong joint look, but check whether sunglasses and the booth light leave the two faces distinguishable. For your opening, look for an orange-booth opening that introduces one partner. Put your own source beside the preview at phone width and check the couple’s approved likeness and the date. If the main detail is already hard to pick out in a still, compare another source or a preview with more separation before generating.
Microphone Duet (600 × 1066, 30 seconds)
Use the movement around the hanging mic to mark where an approved reaction shot from the other partner could enter. To plan a glance toward the second partner, check the frames just before and after the corresponding movement. Note which object or part of the subject first approaches the crop. Keep the last usable frame on either side as a potential trim point.
Stripes and Sundress (960 × 716, 10 seconds)
Different shirts help identify who is answering. Save a clean frame from the end of the exchange and place the RSVP card after it. Work backward from a separate date and RSVP card. Find a frame that could serve as the cover or the start of the next shot. Check it at the intended viewing size. If the important detail disappears there, test the crop in the edit first.
Plan who gets the close-up
Preview the duo scenes in Hotel Lobby AI. The current editor uses one starting image. Pick the partner who will carry the main performance, with their permission. For a version that clearly features both people, make two short takes, or cut to an approved photograph of the couple before the end card.
Plan the cut before making the shots
Draw three boxes in a note and label them opening, reply and ending. For each one, write whose shot it is, where that person looks and what information it adds. You can mix a generated lead, a real reaction shot you have permission to use and a plain card. The three boxes give you a way to deliver the idea even when a single generated scene cannot keep all the performers separate.
Open on one partner in the booth and cut to a short real reaction from the other. Ask both people to approve the likeness and the audience for the final invitation. Put the date, time zone, location and reply link in ordinary text alongside the video so a guest who pauses playback or watches without sound can still respond.
For this scene, make the couple’s approved likeness and the date your first check. Open the file at the same width as your draft and see which part of that detail remains clear. If the sample and your source make that check difficult, try a wider performance crop followed by a clean end card. Choose material you have permission to use for the finished audience. With two people in an edit, approve the sources separately and identify which shot introduces each person.
Assemble a readable save-the-date edit
- Start from the event information that must survive a muted view. Write the date and RSVP action on their own card, and keep the venue address in the private invitation if it should stay private.
- Ask each person which photo and what audience they approve. Choose a take with enough width for the mic and a clean lead close-up. Use one approved starting photo for the first shot.
- Cut out on a nod or the mic handoff. Bring the second person in with a real clip, an approved still, or a separately generated shot with similar framing. Keep the crop and titles consistent across those cuts.
- Hold the date card long enough to read once. Send a private draft to the couple and check the spelling, timing and audience before making any public version.
Two briefs you can paste into your edit notes
Use these as shot notes. For a generation, carry over the part that describes one visible action and match it to the scene already selected. Keep your text cards, edit points and soundtrack on separate tracks. This makes it easy to compare a tighter cut or a different ending without asking the model to rebuild material that already works.
First pass
Open on one partner in the booth with the mic in view. Cut to the other partner's approved reaction. End on a plain card with the wedding date and reply action.
Put the first shot and its reply next to each other on the timeline. Watch until you can tell who is acting and what the other shot adds. When you have a clear sequence, bring in a line of text or the permitted audio. Set the picture rhythm first so there is room to reposition the caption later.
One focused revision
Keep the performance wide through the mic turn. Move the date and RSVP information onto their own held card so guests can read them after the movement.
When the crop hides the mic or the event details, build a second draft around a wider performance crop followed by a clean end card. Keep the strongest opening. Cut to a separate response or a simple end frame where the original action stops being useful. Play both drafts side by side and see which one would make sense to someone who never saw the example.
Preview it as a guest would
On a phone with sound off, check whether you can read the date once without pausing. Then watch with sound and listen across the cut into the end card. Share a private draft with the couple for approval before posting. A wedding teaser works just as well with a track you have rights to use.
For a save-the-date edit, let the first person enter at the mic, cut to a real approved photo of the couple, then hold the date card. If the greeting is going in a group chat, check the smallest phone screen in the group before sending it.
What to check at the opening, action and ending
Before the action
Use an orange-booth opening that introduces one partner to check the couple’s approved likeness and the date. Compare the generated frame with your source at the same viewing size. Check that the feature you care about is visible before the subject turns, the camera moves or a prop enters. If it is already missing, work on the input or framing first. A later adjustment has more to build on when the opening already looks right.
At the main beat
Around a glance toward the second partner, watch once with the picture filling the intended screen and once with a wider crop. If the crop hides the mic or the event details, try a wider performance crop followed by a clean end card. Mark the end of the useful action and see if the next shot still follows naturally. An edit can solve a timing or framing problem while preserving a performance that already works.
After the move
Find a separate date and RSVP card and decide whether it is a usable final frame or a cut point. Play the full clip at normal speed with the sound muted, then turn the sound back on and play it again. The first pass tells you whether the picture explains the action. The second pass lets you hear whether music or dialogue arrives early enough to make sense without masking the reply. If an action only looks awkward when stepped through frame by frame, judge it in the actual export before rebuilding the shot.
Check the quote and prepare the finished cut
Open the Hotel Lobby editor, choose the actual scene and settings, and read the quote shown before submitting. You can check Pavo AI Video pricing for plan details. After submission, use the task state to find the result. Review a completed take before starting another one. If you do need another attempt, write down the one change you are testing.
Keep a copy of the clean file, then make a posting or delivery version. Add any date, reply action or dedication as text you can move independently. Preview it on the destination screen. If the message has to travel outside the video as well, send the relevant details in the accompanying text so viewers can find them after playback.
Give the exported file one last check for the couple’s approved likeness and the date. If the shot needs another pass, keep the exported baseline so the next change is easy to judge. For a separate worked example or a more focused workflow, read Make a Hotel Lobby AI Video From Your Photo.
Common questions
Do both people have to appear in the AI shot?
A single generated lead followed by an approved photo of the couple can carry the full idea. Use separate shots when each person needs to be recognizable, especially if the booth example brings the camera in close to only one face.
Should I put the wedding date over the performance?
A separate card works well when people and the mic move through the same part of the frame. You can place a short names-only line over the intro, then put the event details where they have room to be read.