Choose a Dog Photo That Holds Up During an AI Dance
Compare source photos by body outline, lighting and how much movement the dance needs.
Pick for the movement
For a seated paw move, show the chest and both front paws. For a step or turn, use a floor-level photo with the body, tail and feet inside the crop. Watch the AI Dog Dance previews first so you know whether the routine depends on leg movement or a face close-up.
Compare the example clips before you generate
Watch the AI Dog Dance examples once through, then scrub the preview to see where you would pause. Begin with the clip that frames the feature you want viewers to remember. On a second pass, compare how much space each take leaves around that feature as the subject moves. These times and dimensions describe the preview files; check the generator for current settings.
Shiba Groove (480 × 854, 8.63 seconds)
Compare the position of the front paws in the reference with your dog's natural stance before choosing a dance. For your opening, look for one pet separated from the floor and furniture. Put your own source beside the preview at phone width and check muzzle outline and separate front paws. If the main detail is already hard to pick out in a still, compare another source or a preview with more separation before generating.
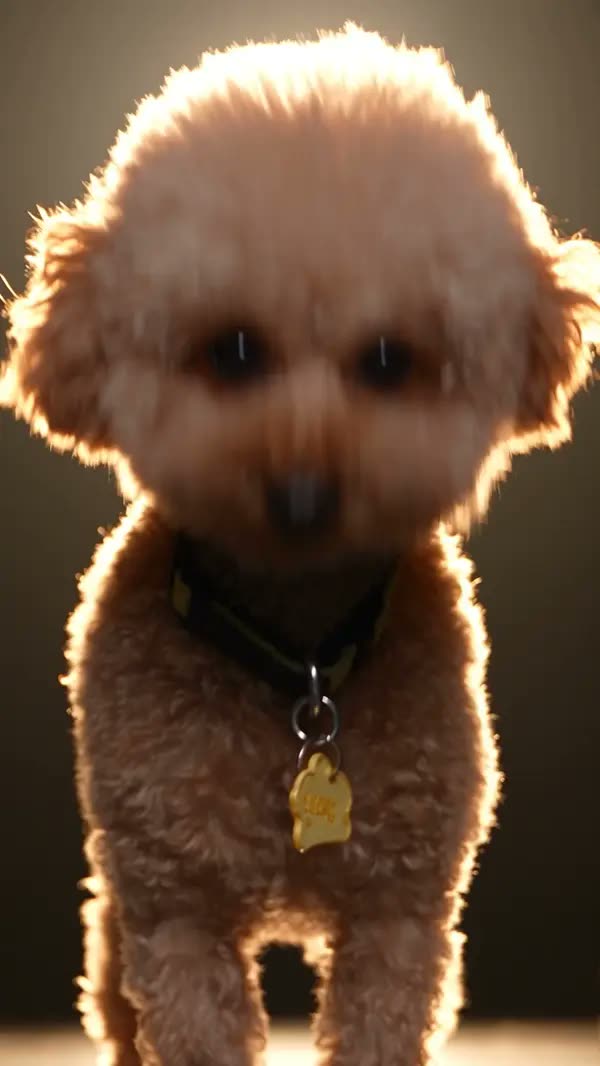
Upright Rhythm Dance (600 × 1066, 29.92 seconds)
Use the rhythm example to check whether your source shows enough floor for a side step. To plan the paw motion the photo needs to support, check the frames just before and after the corresponding movement. Note which object or part of the subject first approaches the crop. Keep the last usable frame on either side as a potential trim point.
Spotlight Puppy (600 × 1066, 20.04 seconds)
Spotlight is a useful contrast test for a dark dog. See whether the muzzle and paws remain separate from the stage. Work backward from the same markings at the final pose. Find a frame that could serve as the cover or the start of the next shot. Check it at the intended viewing size. If the important detail disappears there, test the crop in the edit first.
Separate the coat from the floor
Dark fur needs light along its outline. White fur needs enough texture to keep the ears and legs separate from a pale background. Stand far enough back to avoid the wide-angle distortion of a nose pressed into the lens. A simple wall and an even patch of shade are often enough.
Compare two source files at the same size
Put an original image and a wider alternative side by side. Check them at preview width first, then zoom to check blur, lighting and whether a hand, paw or piece of clothing is already missing. A file can look detailed at full size while leaving the key part of the pose unclear. Decide which file supports the movement before spending an attempt on either.
Place a dark-coated dog on a pale mat if you can take a fresh picture. Wait until the dog stands or sits naturally, then photograph at its eye level. Take a second frame a little wider so you can compare front-paw placement without changing the lighting or asking the pet to hold a pose.
For this scene, make muzzle outline and separate front paws your first check. Open the file at the same width as your draft and see which part of that detail remains clear. If the sample and your source make that check difficult, try a new eye-level photo on a contrasting mat. Choose material you have permission to use for the finished audience. With two people in an edit, approve the sources separately and identify which shot introduces each person.
Make a source-photo contact sheet
- Set aside three photos if you have them. Pick one face view, one seated view and one standing view. List which paws are visible and where the fur blends into the background.
- Match the example’s first pose to the closest of those references. Use the face view for a head move, the seated view for a forepaw beat, and the standing view for a weight shift.
- For a dark or fluffy dog, shoot against a plain surface that separates the chest and legs. Keep the dog far enough from the lens that the nose shape still looks familiar.
- Compare one movement with two suitable references at the same timestamp. Check the paw on the floor, the muzzle and a distinctive marking before choosing the source for your final take.
Two short prompts to try with the selected scene
Start with the direction supplied by Shiba Groove or the example you picked. For a revision, write what should be visible in shot order. Preserve one subject feature and one main action, then stop. Keep the same scene and source on a prompt test so the result tells you whether the new direction helped.
First pass
Keep the dog centered with the muzzle, both front paws and one coat marking visible. Make one small paw movement and settle on the same floor.
Read the brief once against the preview and decide which detail does the most work. The first look should tell the viewer who is there, and the move should read at normal speed. If your prompt introduces a second setting, a different person or an extra camera move, take that instruction out for this first pass.
One focused revision
Light the dog so the dark paw edges stay separate from the floor. Use a shorter paw lift and preserve the original markings.
When dark paws disappear into a similar background, test a new eye-level photo on a contrasting mat and keep the rest of the setup steady. Compare the same action in both takes, using stills if movement makes the difference hard to see. A working first version is also a reference for your next draft. Save its source, chosen scene and short note together.
Choose one dog for the first test
If you have a two-dog photo, choose a new shot where the pets do not touch or crop one out cleanly. Use a known feature, such as an uneven ear or a chest patch, to check the first and last frames. Move on to a duo example after you know one subject reads clearly.
For a light-colored dog on a pale sofa, take a second photo with the dog on a darker mat, at a similar angle. Keep the chosen dance fixed. At the first paw lift, compare how well you can separate toes from the floor in both results.
What to check at the opening, action and ending
Before the action
Use one pet separated from the floor and furniture to check muzzle outline and separate front paws. Compare the generated frame with your source at the same viewing size. Check that the feature you care about is visible before the subject turns, the camera moves or a prop enters. If it is already missing, work on the input or framing first. A later adjustment has more to build on when the opening already looks right.
At the main beat
Around the paw motion the photo needs to support, scrub a few frames in both directions. If dark paws disappear into a similar background, locate the first bad frame and check whether something crosses the subject there. A problem that starts when the hand crosses the face calls for a different correction from a photo that already lacks the right profile. Test a new eye-level photo on a contrasting mat. Hold the other inputs steady and repeat the same pause on the new output.
After the move
Find the same markings at the final pose and decide whether it is a usable final frame or a cut point. Play the full clip at normal speed with the sound muted, then turn the sound back on and play it again. The first pass tells you whether the picture explains the action. The second pass lets you hear whether music or dialogue arrives early enough to make sense without masking the reply. If an action only looks awkward when stepped through frame by frame, judge it in the actual export before rebuilding the shot.
Check the quote and prepare the finished cut
Open the AI Dog Dance editor, choose the actual scene and settings, and read the quote shown before submitting. You can check Pavo AI Video pricing for plan details. After submission, use the task state to find the result. Review a completed take before starting another one. If you do need another attempt, write down the one change you are testing.
Use the selected timestamp to compare the original and the new take. Open the exported file as well as the editor preview, especially if the apparent problem was at the edge of a crop. Keep the version that passes the check at the intended size and note which change improved it. That gives you a specific starting point for the next clip.
Give the exported file one last check for muzzle outline and separate front paws. If the shot needs another pass, keep the exported baseline so the next change is easy to judge. For a separate worked example or a more focused workflow, read Make Your Dog Dance in an AI Video From One Photo.
Common questions
Is a high-resolution screenshot better than a phone photo?
Choose the file with clearer edges around the face and paws. A sharp phone original often has more useful information than a large, compressed screenshot with filters or stickers over the dog.
Can I use a photo where a person is holding the dog?
It can work for a face-led test when the muzzle is clear. If the routine needs a step or a lift, choose a photo with the dog on a visible surface and the person’s arms out of the way.